SwissSPAD Live Windows
SwissSPAD Live is comprised of one main Window and 5 child windows accessible
from the top Windows menu. These different windows are briefly described
next. For further information, please check the User Guide.
Main Window
The main window displays the latest live or recorded image in the top part.
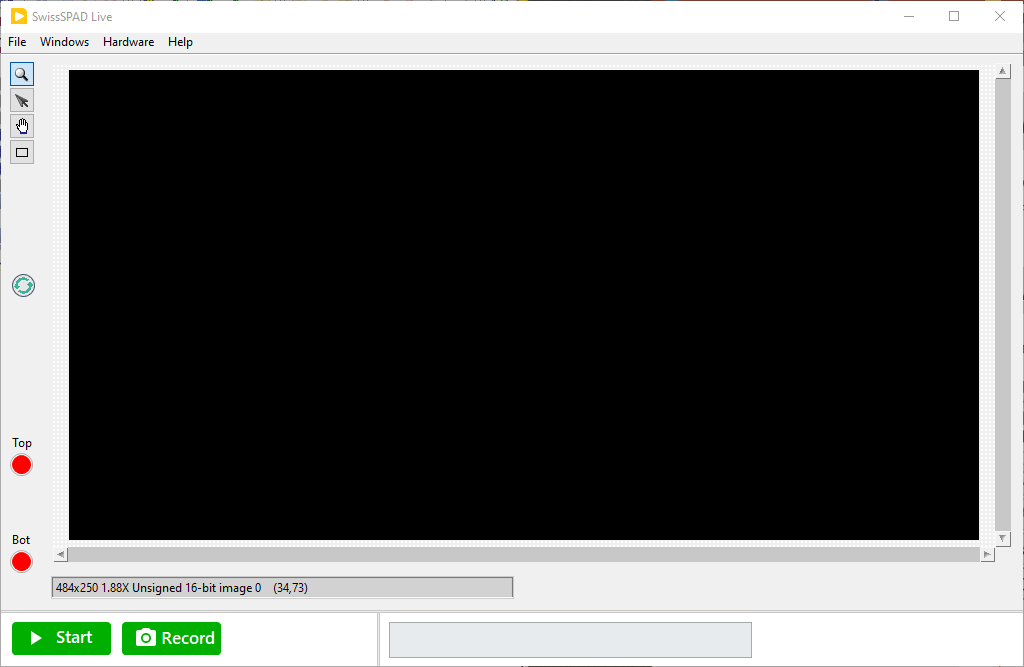
The top menu bar gives access to the following functions:
- File
Quit
- Windows
Settings (
Ctrl+E)Histogram (
Ctrl+M)Notebook (
Ctrl+N)
- Help
Show Context Help (
Ctrl+H)FPGA Status
Reset FPGA
About
The center part displays the last processed image. This object is interactive (use the right-click menu to access the different functions). In particular, it is possible to zoom in (zoom tool + left click) and out (zoom tool + Shift + left click). The rectangular ROI can be used to defined which subregion of the detector to save data from (see Settings >> Image Information).
The bottom part contains the Start and Record buttons, as well as a
Message Box in which information on the current on-going task is displayed.
During processing, an animated busy icon appears to the right of the Record
button. When acquiring data, user inputs are queued until the current task is
completed (some requests such as opening windows are still processed).
During data saving, a blinking LED appears within the busy icon. This is a reminder that while data acquisition might have completed, asynchronous data saving is still taking place. To obtain information on this (or these) process(es), hover over the LED and check the information displayed in the Context Help Window.
- Right-clicking on the LED gives access to the
Abort All Saving Tasksoption. To use this ‘nuclear’ option, first stop the current recording task.
The main window is resizeable.
Settings Window
The Settings window is accessed via the Windows >> Settings menu item
(shortcut: Ctrl+E).
The window consists of several panels which can be accessed from the top pull-down selector: FPGA, Acquisition Parameters, Image Parameters, File Information and UI Parameters.
FPGA
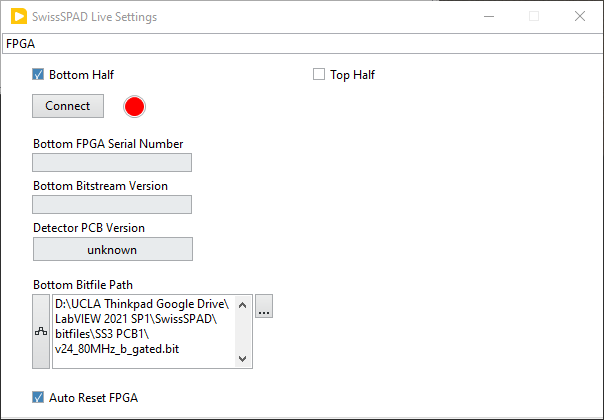
The FPGA panel is used to specify which bitfile to upload to the FPGA (and therefore which task the detector can subsequently perform) and establish initial connection with the FPGA.
Sensor HalfThe first choice to make is which half of the sensor is used, by checking one of the two checkboxes at the top of the panel. In both SS2 & SS3, the two halves of the sensor are read by their own FPGA. Currently SwissSPAD Live supports reading either one of the two halves, but not both at the same time.
Connect to FPGAThe
Connectbutton needs to be pressed to establish a connection with the FPGA. If successful, the FPGASerial Number,Bitstream Versionand storedDetector PCB Versionare displayed in the corresponding indicators. The latter information is stored in an editable file (FPGA Database.txt) located in thebitfilesfolder. This file stores S/N, type of detector firmware and FPGA location. This information is used by SwissSPAD Live to pass the correct parameters to the firmware. It is critical to update this file only when a new FPGA is installed on a detector or when a new detector is used.Bitfile PathSelect which bitfile to use. The selected file needs to be designed for the correct sensor (SS2 or SS3) and also for the correct half (conventionally referred to as “top” or “bottom”). Moreover, it should support the SYNC signal frequency that will be used during acquisition. Generally, the bitfile name will specify which half (‘b’ or ‘t’) and which frequency (‘80MHz’, ‘40MHz’ or ‘20MHz’) it corresponds to.
For SS2, there are two types of available bitfile for each FPGA: an
intensitybitfile and a “gated” one. The former ignores all gate settings (see next panel description), keeping the gate open during the whole 1-bit frame integration time, and is typically used for live mode imaging (e.g. for focus adjustment).The latter is used for time-gated data acquisition. It can of course also be used in live mode, but in that case, the gate position is fixed to the starting value defined in the Acquisition Parameters panel.
For SS3, a single bitfile is used for both modes, which are selected in the Acquisition Parameters panel (see below).
Auto Reset FPGACheck the
Auto Reset FPGAcheckbox to let the software automatically reset the FPGA during acquisition in case of time out, and repeat the failed recording.
Acquisition Parameters
The Acquisition Parameters panel is used to specify gate parameters as well as the number of gates and their exposure, etc. Parameter values displayed on a gray background are indicators (they cannot be modified by the user) and are updated automatically when the user modifies other parameters.
The Acquisition Parameters panel looks slightly differently for SS2 and SS3. Below is the typical aspect when using SS2:
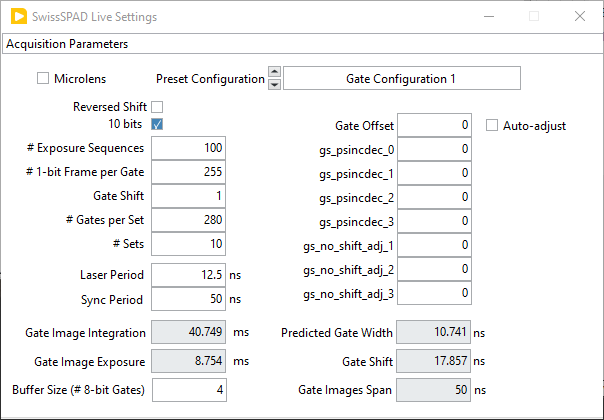
Note in particular the pull-down Preset Configuration list allowing
selection of one of the 7 predefined gate definitions.
The following shows the panel’s aspect when using SS3:
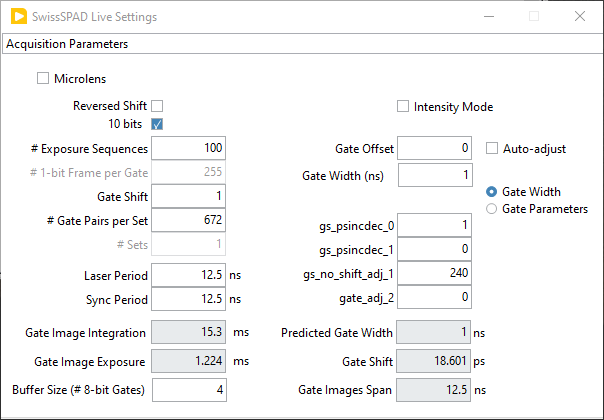
Please check the User Guide section for a detailed description of the different parameters.
Image Parameters
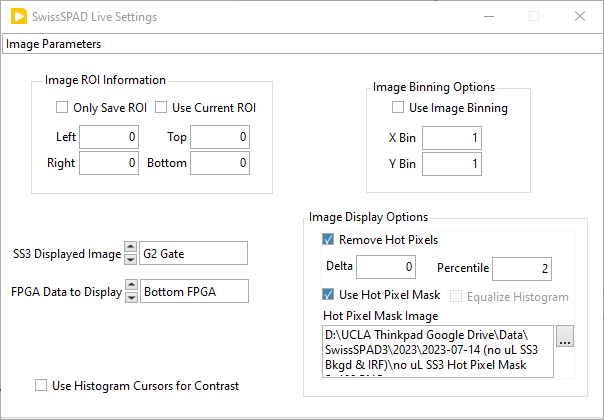
The Image Parameters panel is used to specify whether or not:
only a region of interest (ROI) of the frame is saved
define the ROI (user defined by numerical values or as drawn on the main window image)
data is binned before being saved
the Bottom or Top FPGA data is shown
the image histogram cursors are used to adjust the displayed image contrast
to replace hot pixels by the median value of their neighbors (and set related parameters accordingly)
In the case of SS3, an additional selector is shown (SS3 Displayed Image)
allowing chosing what data is shown as displayed image.
Note that while using a ROI or binning the data results in smaller files, the data acquisition process still uses the full sensor frame, image cropping and binning occuring in software before data saving. In other words, the data acquisition time is independent of these settings. The additional data processing involved is usually minimal. However, data saving can be considerably sped up, and the data footprint reduced accordingly.
Keep in mind that once cropped or binned, the original data cannot be recovered.
File Information
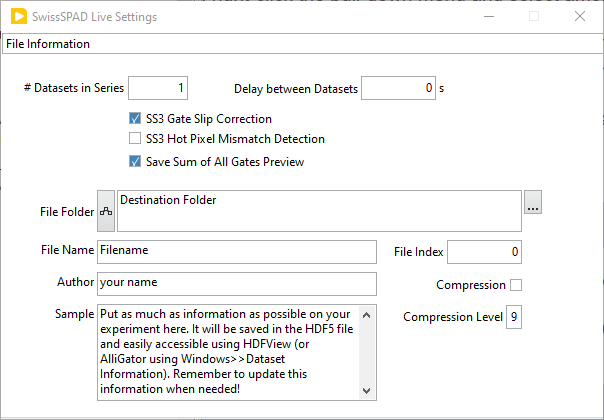
The File Information panel is used to define the file path, start index, etc. and additional information about the recorded data file(s), as detailed next.
# Datasets in Series: specifies the number of times the preset acquisition is repeated, one file being saved after each acquisition, its index starting at the currentFile Indexvalue + 1 and being incremented by 1 for each new file.Delay between Datasets: used to add a pause after each dataset acquisition.Add Underscore Prefix: used to easily identify SS2 dataset files which have been identifed as comprising data that was scrambled during transfer from FPGA, or comprising less gates than requested.SS3 Gate Slip Correction: used to check whether some typical pattern occurring when data is lost during transfer from the FGPA to the PC is present. The resulting gate images are 16 pixels shorter than usual (484 x 250 instead of 500 x 250).SS3 Hot Pixel Mismatch Detection: used to check whether the location of detected hot pixels in the recorded dataset match the stored locations. In case of mismatch, the dataset is discarded.Save Sum of All Gates Preview: saves a PNG image of both INT and G2 gate sum images for rapid detection of data scrambling during transfer.File Folder: specifies which folder the files are saved in. Use the Browse button (3 dots) to the right to select the target folder.File Name: represents the root file name, to which_n.hdf5will be added, wherenis the value ofFile Index, displayed as a 4-digit number (zero-justified).Compression: if checked, each time-gate image stored in the final HDF5 file is compressed using the zlib compression algorithm.Compression Level(0 - 9, default: 9): Compression adds to the data saving duration, but can reduce the final file size severalfold, depending on the gate image complexity. In general, file saving starts becoming slower than data acquisition for compression level 7 and above, while the additional file size reduction is minimal.Author,Sample: recommende fields used to document the file.
UI Parameters

The UI Parameters panel is used to set:
Verbose Settings: turn on/off sending settings changes to the Notebook.Verbose Saving: turn on/off sending additional information related to data transfer when saving datasets.Image Histogram
Use Image Display Options: check this box to use theImage Display Optionsdefined on the Image Parameters panel to build the histogram. In particular, if theRemove Hot Pixelsoption is selected, the histogram will be calculated using the modified image, allowing a cleaner view of the useful distribution of pixel intensities in the dataset. This will however increase processing time.
Histogram Bin Size: bin size used for the image histogram. The default is 1 and should generally be appropriate for most images.
Notebook
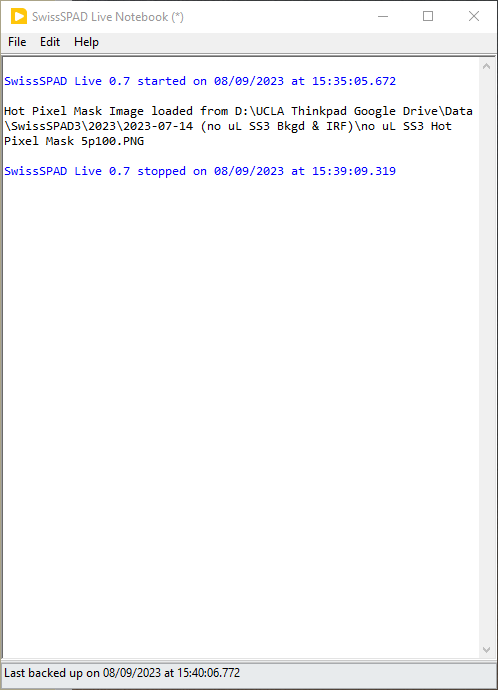
The Notebook is a Rich Text Box object in which most actions performed by the
software are recorded. It is accessed via the Windows >> Notebook menu item
(shortcut: Ctrl+N).
It can also be used to type in user comments, copy/paste text or graphics, etc. and in general is intended as a log of an experimental session.
The content of the Notebook can be saved (and re-opened within the Notebook) as a rich text format (.rtf) file.
Tne Notebook is backed-up automatically every 5 min and in case of a crash, can be found in the C:UsersusernameAppDataLocalTemp folder (which is hidden by default) under the name ~SwissSPAD Live Notebook n.rtf where n is a random number. The time of last backup is indicated at the bottom of the Notebook.
Note: It is strongly recommended to save the Not ebook’s content after each data acquisition session for reproducibility purposes.
Histogram Window
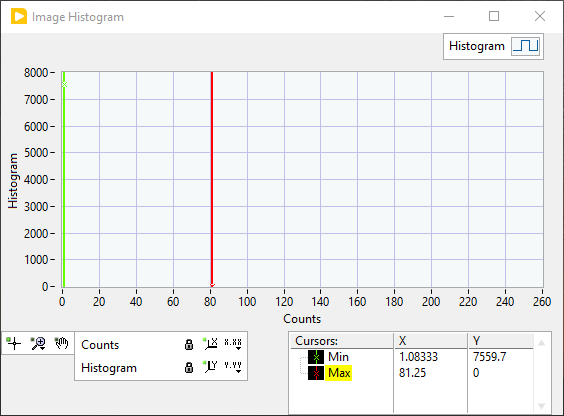
The Histogram Window shows an histogram of the displayed image’s pixel values.
It is opened with the Windows >> Histogram menu item (shortcut: Ctrl+M).
The bin size is defined in the Settings >> UI Parameters
panel.
If the Use Histogram Cursors for Contrast checkbox has been checked in the
Settings >> Image Parameters panel, the cursors will be used to
define the minimum and maximum values displayed using the selected color palette.
The Histogram window is resizable.
Context Help Window
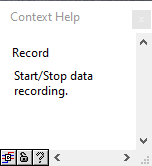
The Context Help window is a floating window and shows information (when
available) about the object the mouse is over. It is shown or hidden using the
Help >> Show Context Help menu item (shortcut: Ctrl+H).
In particular, it is used to display file saving progress when hovering over the
Saving in progress blinking LED showing up at the bottom of the main window
when datasets are being saved in the background.
About Window
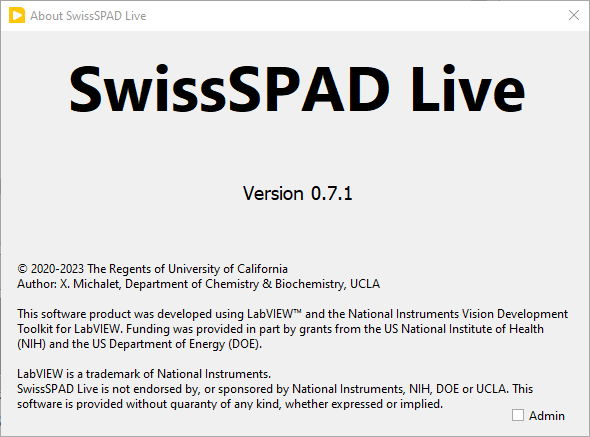
The About Window is a dialog window (it prevents other windows from being interacted with). Click anywhere in it to close it.